Sensything as an IOT device
![]()
* Overview
Sensything along with Adafruit IO is paves way to a whole new world of IOT. It is used for storing and then retrieving data but it can do a lot more than just that!
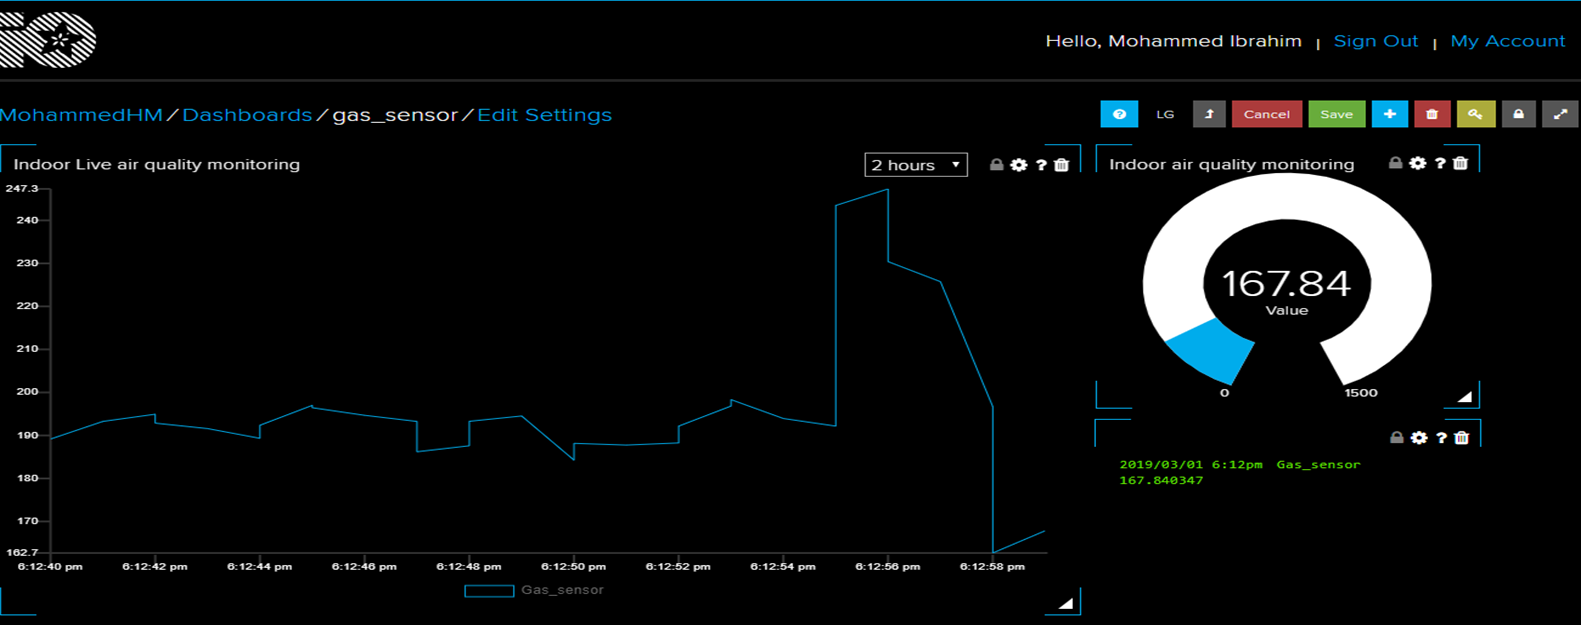
- Display your sensor (in this case gas sensor data) measuring gas density in real-time, online.
- Make your experiment internet-connected by reading sensor data
- Connect projects to web services like Twitter, RSS feeds, weather services, etc.
- Connect your project to other internet-enabled devices.
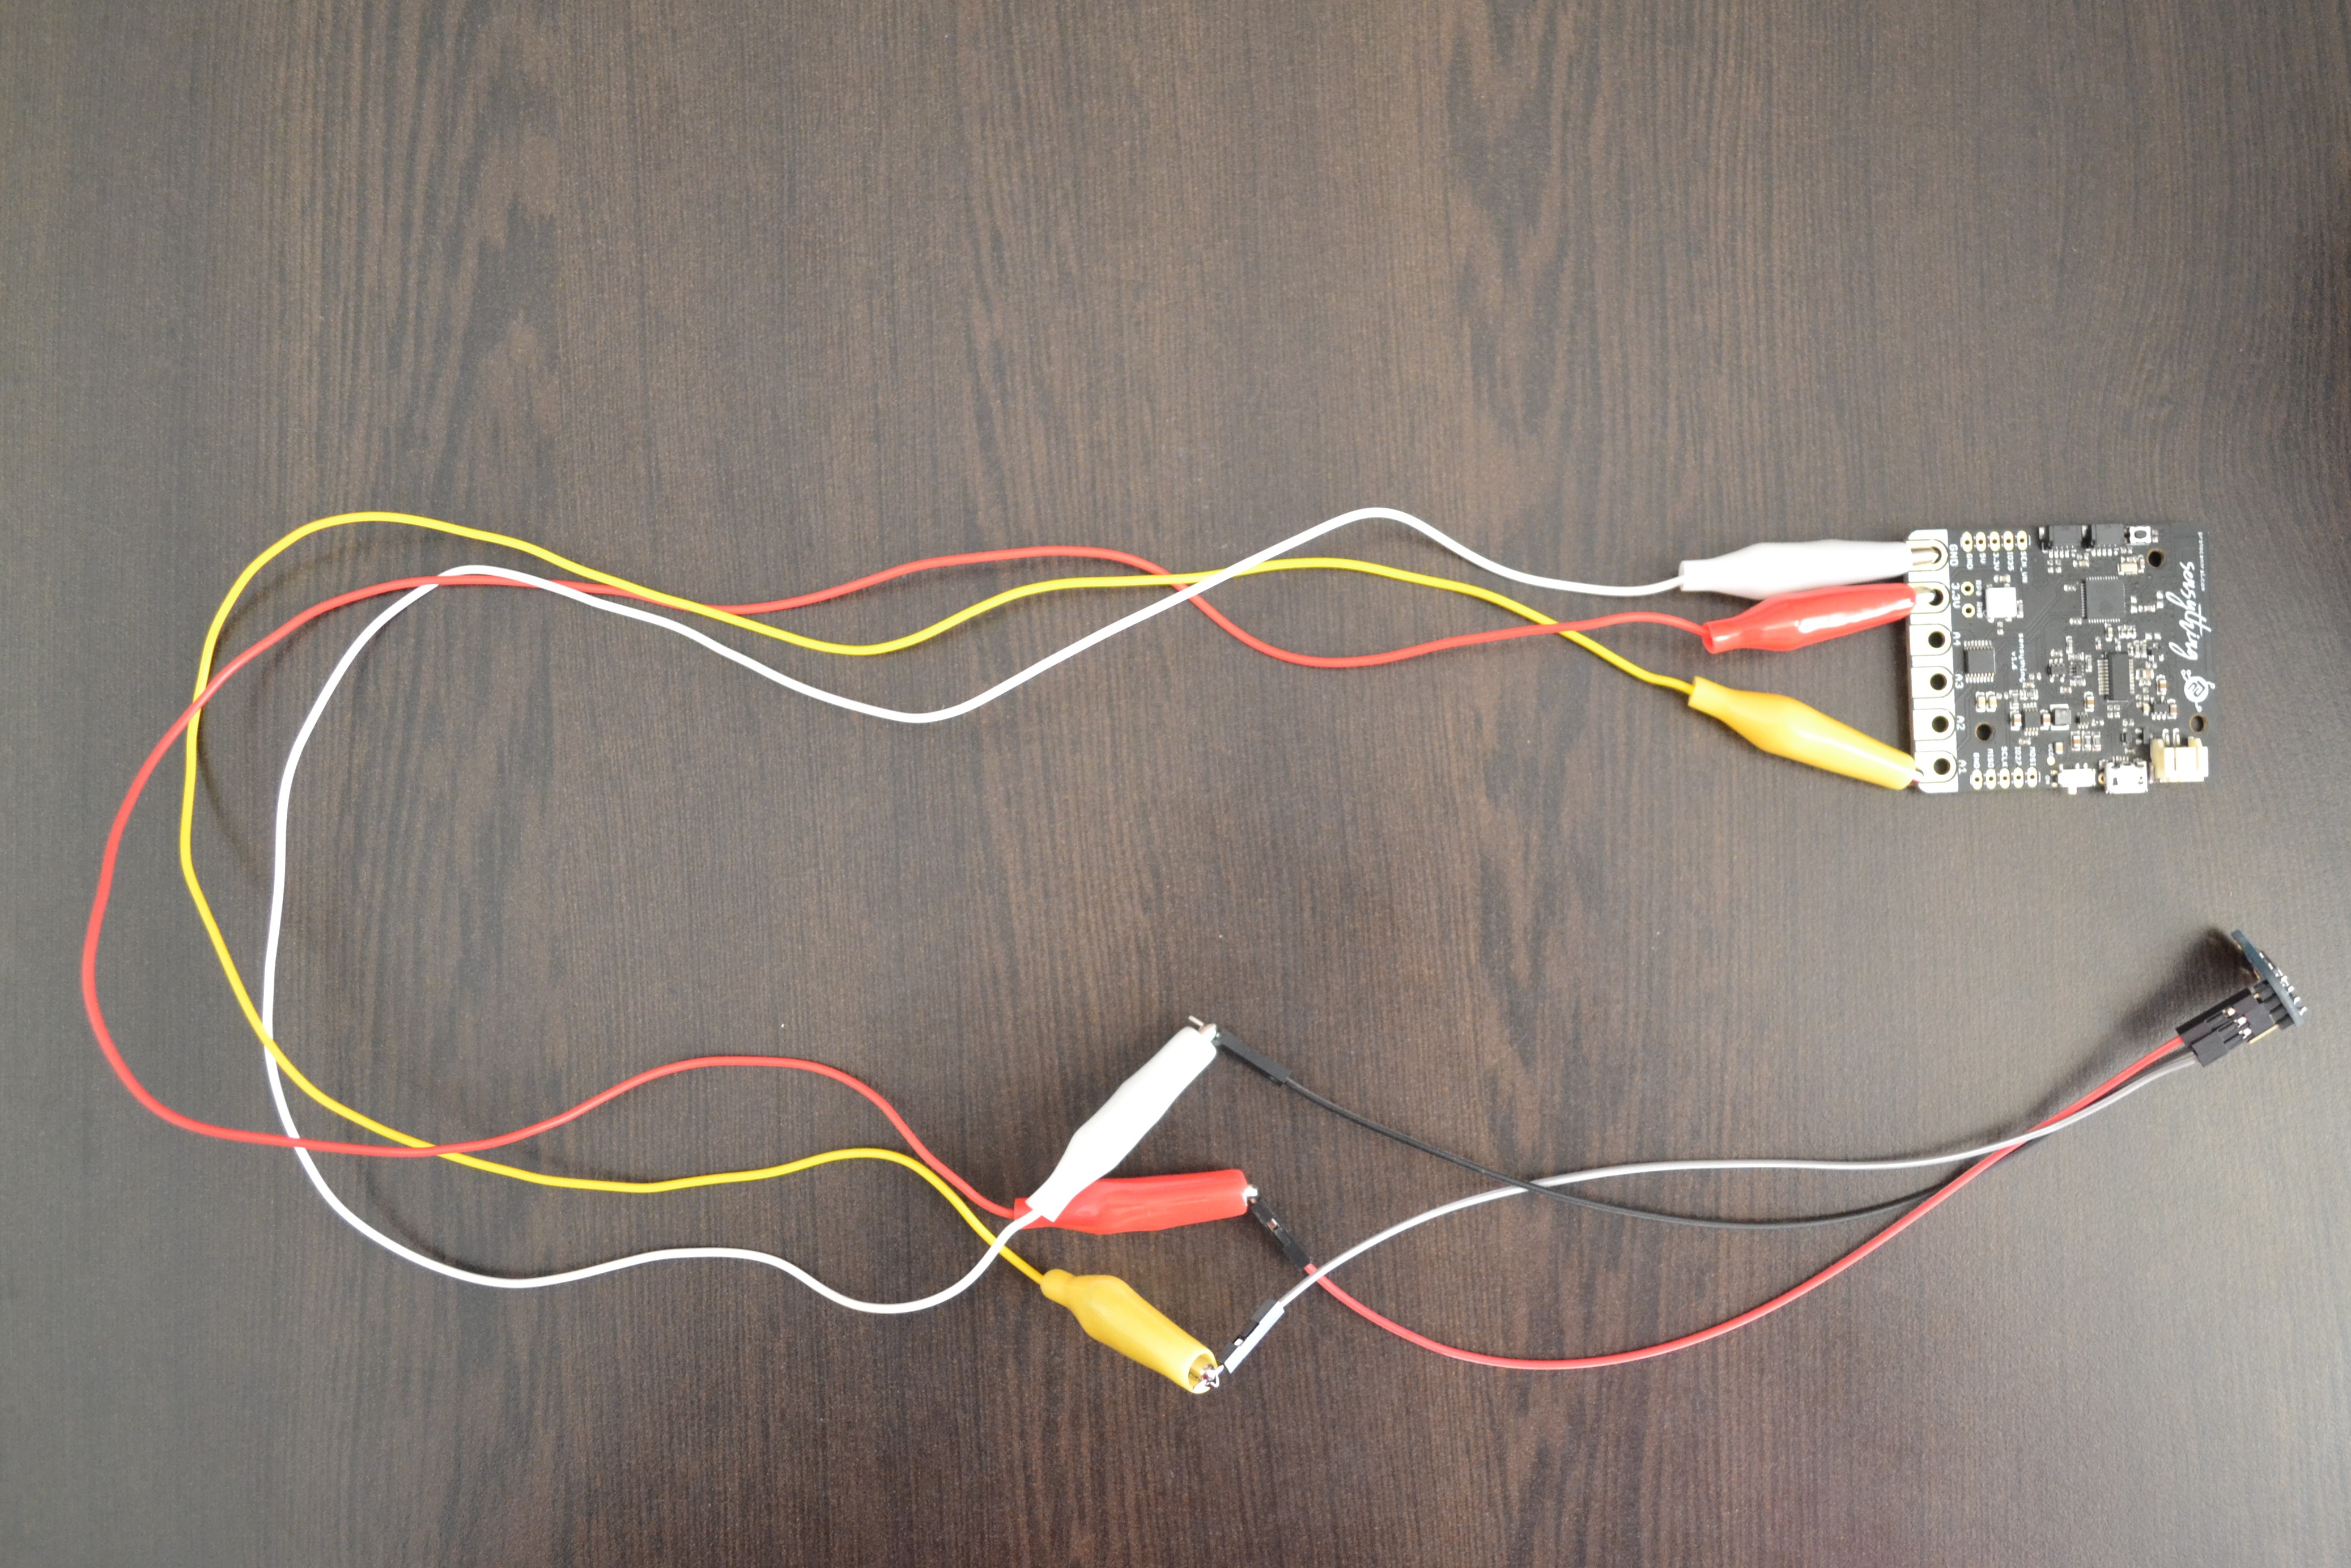
* Sensything Wiring
You will need the following parts for this tutorial but it’s just Plug & Play with Sensything…..!
- 1x Sensything Board
- 1x Mics5524 gas sensor
- 3x Alligator Cables
- 3x Jumper wires
Pin connections are as follows:-
- Sensything 3V to Pin 1 of the Mics5524
- Sensything GND to Pin 2 of the Mics5524
- Sensything A1 to Pin 3 of the Mics5524
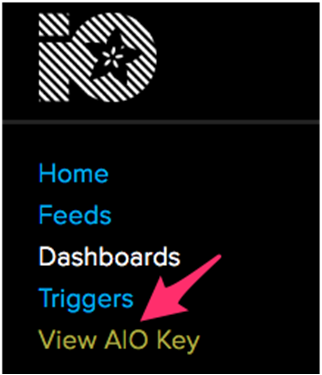
* Adafruit IO Setup
The first thing you will need to do is to log in to Adafruit IO and visit the Settings page. Click the VIEW AIO KEY button to retrieve your key. A window will pop up with your Adafruit IO Key.
* Creating the Feeds
First, you will need to create a feed. If you need help getting started with creating feeds on Adafruit IO, check out the Adafruit IO Feed Basics guide.
* Arduino Setup
* Install the Required Libraries
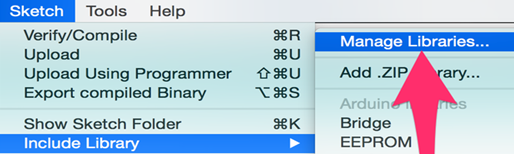
Initially you need to install the Adafruit IO, Adafruit MQTT, and Arduino Http Client libraries using the Arduino Library Manager. Navigate to the Manage Libraries… option in the Sketch -> Include Library menu.
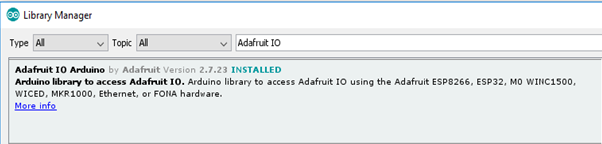
Enter Adafruit IO Arduino into the search box and click Install on the Adafruit IO Arduino library option to install version 2.7.23 or higher.
You will also need to install the Adafruit MQTT library.

* Arduino Network Config
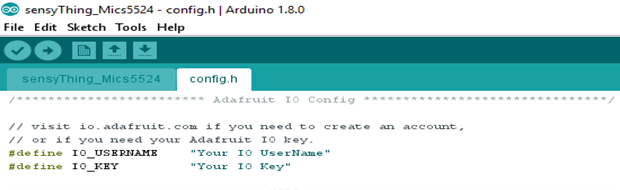
To configure the network settings, click on the config.h tab in the sketch. You will need to set your Adafruit IO username in the IO_USERNAME define and your Adafruit IO key in the IO_KEY define.
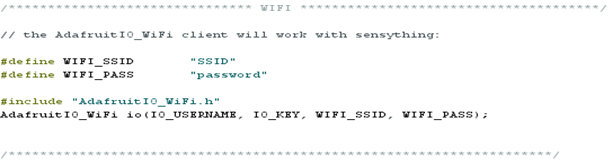
* WiFi Config
WiFi is enabled by default in config.h. You will only need to modify the wifi_ssid and wifi_ssid options in the config.h tab.
* Arduino Code
The sensyThing_MICS example initializes the inbuilt ADS1220 in your sensything, and also connects your sensything to Adafruit IO.
ADS1220.begin();
io.connect();
The first line of the loop function calls io.run(); this line will need to be present at the top of your loop in every sketch. It helps keep your device connected to Adafruit IO, and processes any incoming data. The next chunk of code inside the loop checks the current MICS gas density and saves the value.
io.run();
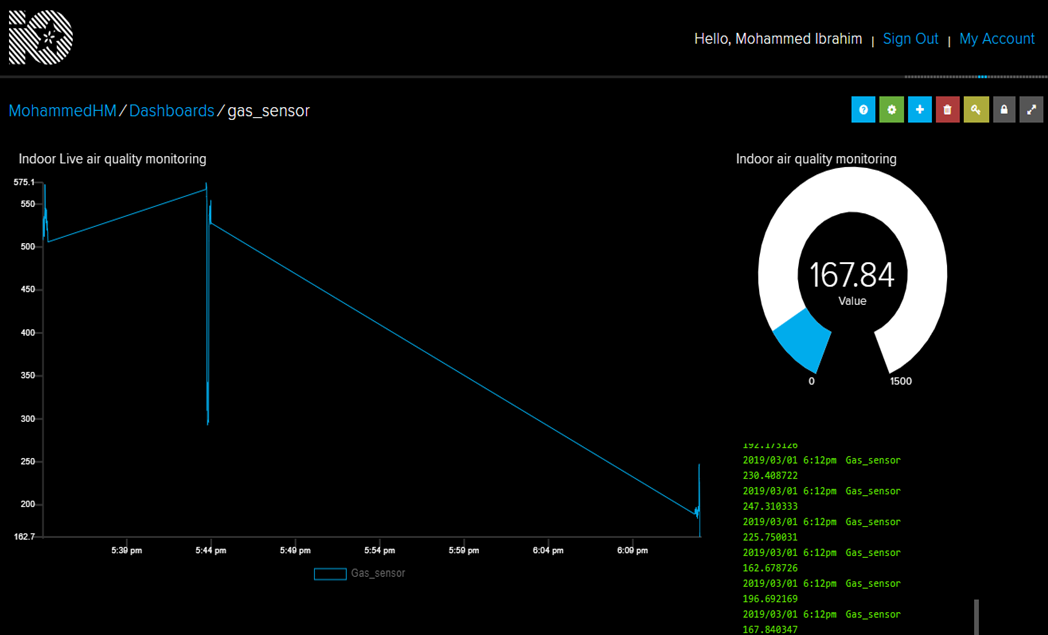
We then print gas density value to the Arduino Serial Monitor and save the value to the gas density feed on Adafruit IO. Upload the sketch to your board and open the Arduino Serial Monitor. Your board should now connect to Adafruit IO. Check your dashboard on Adafruit IO and you should see the line chart update with the changes in the gas sensor.
float Vout = (float)((bit32*VFSR*1000)/FSR); //In mV
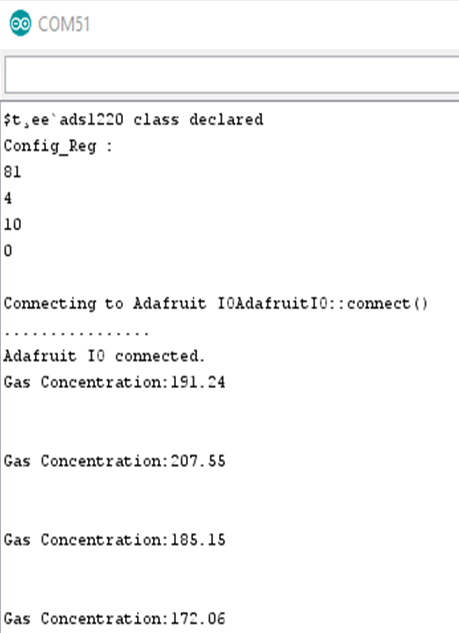
Serial.print("Gas Concentration:");
Serial.println(Vout);
gas_sensor->save(Vout);
Upload the sketch to Sensything, and open the Arduino Serial Monitor. Sensything should now connect to Adafruit IO.